Devices are added in “Rooms”. The multi-level setup supports both small and large homes
Basics:
- Devices in Enlighter belongs to “Rooms”
- “Rooms” can belong to a “Level”
- A “Level” can belong to another “Level” allowing for hierarchical setups
- Example of setup with two different houses:
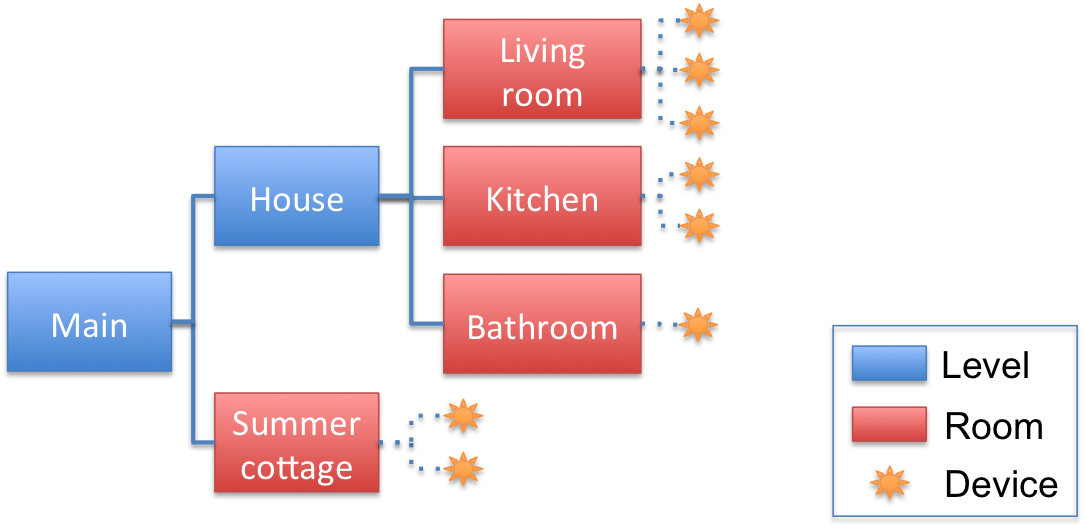
- In the case above, the “Summer cottage” is created as a “Room” as there are only two devices in the cottage
- Devices and levels can be moved, so you can change the setup if you find a more suitable solution for your situation at a later stage
1. To create a Level or a Room, go to the List or Graphical view and click the Edit button to get into
“Edit mode”

2. In Edit mode, click “Add new item”
3. In the screen that appears, you can:
- Add the name of the level
- Choose to create a Level or Room (this will be used to determine if you should be able to add devices or other levels – please see the explanation above)
- Add an image/picture from your camera or camera roll
Note: You can not change a Level to a Room or vice-versa at a later stage if the Level or Room has “child entities”
4. Click “Done” to save
If you click the “Edit button” in a room, you will get the option to add a new device (i.e. create a connection to a Telldus Live! device).
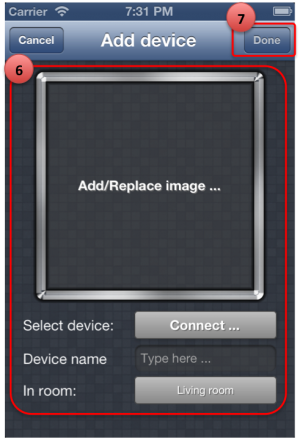
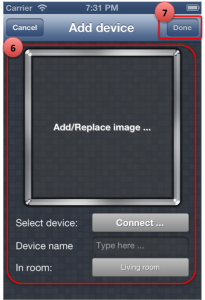
6. In the screen that appears, you can:
- Select the Telldus device to use (you must be logged in to the Telldus service for this)
- Add the name of the Device
- Choose which room the device should be shown in
- Add an image/picture from your camera or camera roll
7. Click “Done” to save
You will also be able to add “all devices” to a room by using the icon to the top left in Edit mode. In this case all devices will be added with the device names as defined in Telldus Live! You can then add images or move the devices betweeen rooms one by one.